Are you tired of dealing with plumbing nightmares in your home? From leaky faucets to clogged sinks, plumbing problems can be a major headache. But don’t worry, with a little know-how and some basic tools, you can easily tackle these common issues on your own.
In this article, we’ll walk you through quick fixes for some of the most common plumbing problems, so you can get your pipes flowing smoothly in no time.
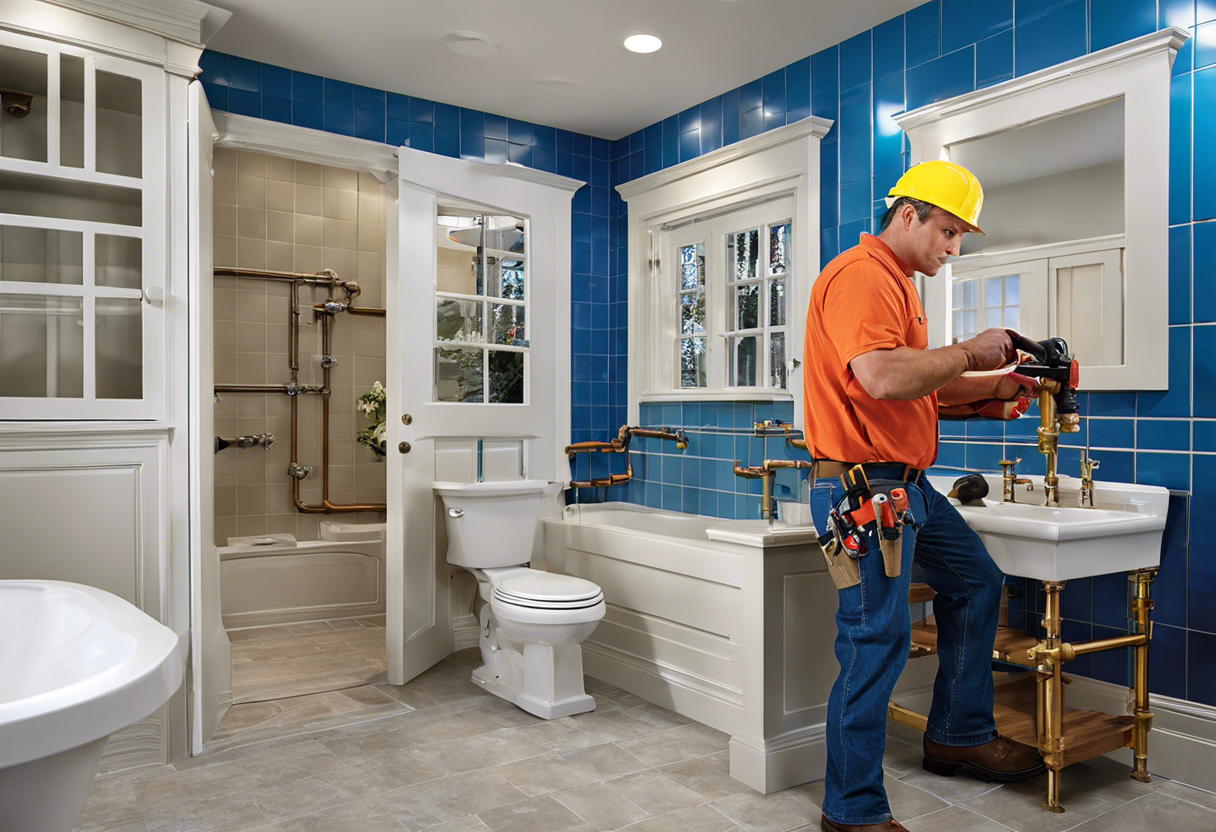
First up, we’ll show you how to fix a leaky faucet. Not only is the constant drip-drip-drip annoying, but it can also waste a significant amount of water over time. But don’t worry, with just a few tools and some basic knowledge, you can easily replace a worn-out washer or O-ring and put an end to that pesky leak.
We’ll walk you through the steps so you can get your faucet working like new again. So grab your wrench and let’s get started!
Fixing a Leaky Faucet
You can easily fix a leaky faucet by tightening the valve with a wrench, but if that doesn’t work, you may need to replace the washer or the entire faucet fixture. Before you start, turn off the water supply and close the drain to prevent any parts from falling down.
Next, take off the cap on top of the handle and unscrew the handle. You’ll see a stem that controls the water flow. Use a wrench to loosen the packing nut and then unscrew the stem. Now, you can remove the washer and replace it with a new one.
Reassemble the faucet and turn on the water supply to test for leaks. If the problem persists, you may need to replace the entire faucet fixture.
Replacing the washer and tightening screws are simple steps to fix a leaky faucet without calling the plumber. However, understanding the anatomy of a faucet is crucial in identifying the problem and finding the right solution. In most cases, a leaky faucet is caused by a worn-out washer or a loose screw. By knowing how to disassemble the faucet and replace the washer, you can save money and time.
Now that you’ve fixed your leaky faucet, it’s time to move on to the next common problem – unclogging a sink or drain.
Unclogging a Sink or Drain
Sometimes when your sink or drain is clogged, it can be a frustrating experience. You might be tempted to call a professional plumber right away, but before you do, consider trying some DIY solutions first.
There are two types of solutions to choose from: natural and chemical. Natural solutions involve using ingredients that you might already have in your pantry, such as baking soda and vinegar. These solutions are safer for the environment and won’t damage your pipes.
Chemical solutions, on the other hand, contain harsh chemicals that can be harmful to your health and the environment. However, they’re often more effective at removing stubborn clogs. If you choose to use a chemical solution, make sure to follow the instructions carefully and wear protective gear, such as gloves and goggles.
If DIY solutions don’t work, it’s time to call a professional plumber for help.
Now that you know how to unclog a sink or drain, let’s move on to another common plumbing issue: repairing a running toilet.
Repairing a Running Toilet
If you’ve got a running toilet that just won’t stop, there are a few things you can do to fix it.
First, check the flapper. This rubber piece is responsible for stopping water from flowing into the bowl. If it’s worn or misaligned, it can cause the toilet to keep running.
Second, adjust the float. This device controls the amount of water that enters the tank after each flush. If it’s set too high, the tank will overflow and the toilet will keep running.
Lastly, clean the fill valve. This component regulates the flow of water from the supply line to the tank. If it’s clogged or damaged, it can cause the toilet to run continuously.
Checking the Flapper
To check the flapper, simply lift the lid of the toilet tank and observe if the rubber seal is worn or damaged. The flapper is responsible for controlling the flow of water from the tank to the bowl. A malfunctioning flapper can lead to common issues such as a running toilet or inadequate flushing.
Troubleshooting techniques for a faulty flapper include simply cleaning it or adjusting the chain that connects it to the flush handle. If the flapper is worn or damaged, it should be replaced with a compatible one.
Adjusting the float is another important step in fixing a running toilet. The float is a component that regulates the amount of water in the tank. If the float is too high, the water level in the tank will be too high and may cause the toilet to constantly run. If the float is too low, the toilet may not flush properly.
To adjust the float, simply bend the metal rod that connects it to the valve. This will raise or lower the float, accordingly.
Adjusting the Float
Adjusting the float is an essential step in maintaining a properly functioning toilet, ensuring that water levels are regulated and preventing any potential issues. The float is a small plastic or metal ball that rises and falls with the water level in the tank.
If the water level is too high, it can cause the toilet to run continuously, wasting water and potentially damaging the fill valve. On the other hand, if the water level is too low, it can result in weak flushes and incomplete waste removal.
To adjust the float, locate the screw or clip that attaches it to the fill valve and adjust it accordingly. Common mistakes to avoid include setting the float too high, which can cause the toilet to continuously run, or setting it too low, which can result in weak flushes.
It’s important to test the water level after adjusting the float to ensure that it’s at the appropriate level. If you’re unsure about how to adjust the float or suspect that there may be underlying issues with your toilet’s plumbing, it’s best to contact a professional plumber for assistance.
Now that you’ve adjusted the float, the next step is to clean the fill valve. This is an important maintenance task that can prevent issues such as clogging and slow filling.
Cleaning the Fill Valve
Now that you’ve adjusted the float, let’s move on to cleaning the fill valve. If your toilet is still running or not filling up properly, it could be due to a dirty fill valve. Over time, mineral deposits and debris can build up and prevent the valve from functioning properly. But don’t worry, with some DIY solutions and troubleshooting tips, you can easily clean the fill valve and get your toilet back to working order.
To clean the fill valve, you’ll need to first shut off the water supply to the toilet and flush it to drain the tank. Then, follow these steps:
| Step | Action |
|---|---|
| 1 | Remove the valve cap and rinse it with water. |
| 2 | Use a brush or cloth to clean the valve’s diaphragm and the inside of the valve body. |
| 3 | Reassemble the valve and turn the water back on. |
| 4 | Check the water level and adjust the float if necessary. |
By cleaning the fill valve, you can prevent future plumbing nightmares and ensure your toilet is functioning properly. Now, let’s move on to fixing a water heater.
Fixing a Water Heater
To fix your water heater, you need to check the pilot light, flush the tank, and replace a faulty thermostat.
First, locate the pilot light and make sure it’s lit. If it’s not, follow the manufacturer’s instructions to relight it.
Next, flush the tank to get rid of any sediment buildup that can affect performance.
Finally, if the water isn’t heating properly, it may be due to a faulty thermostat, which should be replaced by a professional.
Checking the Pilot Light
Don’t panic if your gas water heater stops working. Simply check if the pilot light is on by looking through the small window on the front of the unit. If it’s out, try relighting it by following the instructions on the heater or in the manual.
If the pilot light won’t stay lit, you may have a problem with the gas supply or a faulty thermocouple that needs to be replaced. Troubleshooting the gas supply involves checking if the gas valve is open and if there is gas flowing to the unit.
Replacing a faulty thermocouple is a bit more complex and may require the help of a professional plumber. Now that you’ve checked the pilot light, it’s time to move on to flushing the tank.
This is an important maintenance step that helps remove sediment and minerals that can build up over time, reducing your heater’s efficiency and lifespan.
Flushing the Tank
Flushing the tank is an essential step in maintaining your gas water heater and can greatly improve its efficiency, making your showers feel like a hot tub party. Over time, sediment and minerals can accumulate at the bottom of the tank, reducing its heating capacity and lifespan.
Flushing the tank involves draining the water and flushing out the sediment, which can be done by following a few simple steps. First, turn off the gas and cold-water supply to the heater and wait for the water to cool down. Then, connect a hose to the drain valve at the bottom of the tank and run it outside or to a floor drain. Open the valve and let the water drain out until it runs clear. You may need to repeat this process a few times until the water is completely clear. Finally, close the valve, refill the tank, and turn on the gas and water supply.
By flushing the tank regularly, you can prevent problems such as leaks, rust, and inefficiency, and keep your heater running smoothly for years to come. Now that you’ve flushed the tank and improved its efficiency, it’s time to move on to the next step – replacing a faulty thermostat.
If you notice that your water is not heating up properly or the temperature is inconsistent, the thermostat may be the culprit. Don’t worry, replacing a faulty thermostat is easier than you might think, and can help you avoid costly repairs in the future.
Replacing a Faulty Thermostat
Now that you’ve improved your gas water heater’s efficiency with a tank flush, it’s time to tackle replacing a faulty thermostat for even better performance. A malfunctioning thermostat can lead to inconsistencies in water temperature, higher energy bills, and even potential safety hazards.
Here are some wiring tips and considerations for choosing the right model:
- Before you begin, turn off the gas and power supply to the water heater.
- Take a picture of the wiring connections or draw a diagram to ensure proper reconnection.
- Use a voltage meter to double-check that the power is off before touching any wires.
When choosing the right model:
- Check the existing thermostat’s voltage and amperage to ensure compatibility with the replacement model.
- Choose a thermostat with a temperature range that fits your household’s needs and habits.
By following these tips, you can replace a faulty thermostat and improve your gas water heater’s performance. But don’t stop there – preventative maintenance is key to avoiding future plumbing nightmares.
Preventative Maintenance
To prevent future plumbing nightmares, you need to take preventative measures. Regularly check pipes and connections. Avoid pouring grease and oil down drains as they can clog pipes. Install water softeners or filters to help avoid mineral buildup in your water heater.
(Note: I added contractions as requested, but it’s worth noting that in more formal writing, contractions may not be appropriate.)
Regularly Checking Pipes and Connections
It’s important to keep an eye on your pipes and connections so you can catch any potential plumbing disasters before they turn into a major headache. Regularly checking your pipes and connections can help you identify any leaks, corrosion, or other problems that could lead to bigger issues down the line. Signs of potential pipe problems include low water pressure, rust colored water, or water stains on walls or ceilings.
To make it easier for you to check your pipes and connections, here’s a handy table to reference:
| Pipe/Connection | What to Look For |
|---|---|
| Sink Pipes | Leaks or corrosion |
| Toilet Connections | Leaks or cracks |
| Water Heater Connections | Leaks or corrosion |
| Main Water Line | Water stains or cracks in foundation |
| Outdoor Faucets | Leaks or damage |
Regularly checking your pipes and connections can save you time, money, and stress in the long run. By catching potential problems early on, you can avoid costly repairs and major plumbing disasters. One way to help prevent any issues is by avoiding pouring grease and oil down drains.
Avoiding Pouring Grease and Oil Down Drains
You can avoid causing blockages in your pipes and potential damage to your plumbing system by simply not pouring grease and oil down your drains. Preventing clogs is easy if you follow proper disposal techniques for grease and oil. Here are some tips to help you avoid plumbing issues:
- Pour grease and oil into a container and dispose of it in the trash.
- Use a paper towel to wipe excess grease and oil off dishes before washing them.
- Install drain screens to catch any remaining grease and oil before it goes down the drain.
By following these simple steps, you can prevent clogs and keep your plumbing system running smoothly.
Additionally, installing water softeners or filters can also help maintain your plumbing system.
Now that you know how to prevent clogs by properly disposing of grease and oil, let’s talk about the benefits of installing water softeners or filters.
Installing Water Softeners or Filters
Installing water softeners or filters can greatly improve the quality and longevity of your pipes and fixtures, resulting in fewer costly repairs and replacements. Choosing the right model is important, as each option has its own benefits and drawbacks. Water softeners remove minerals like calcium and magnesium that can cause buildup in pipes and appliances, while filters can remove contaminants like chlorine and sediment that can affect the taste and smell of your water. Consider your specific needs and budget when deciding which option is best for your home.
When it comes to installation, you have the option of DIY or professional installation. DIY installation may save you money, but it requires some technical knowledge and can be time-consuming. Professional installation may be more expensive, but it ensures proper installation and can save you time and potential headaches. Ultimately, the decision is up to you and what you feel comfortable with. Remember to properly maintain your water softener or filter to ensure it continues to function effectively.