So, you’ve decided to take on the task of installing a residential septic tank. Congratulations on taking the first step towards a more sustainable and self-sufficient way of living! However, before you grab your shovel and start digging, there are a few things you need to know.
Firstly, proper planning and permits are crucial for a successful septic tank installation. You will need to determine the size and type of septic tank that suits your household’s needs, as well as obtain any necessary permits from your local government.
It’s important to keep in mind that septic tank installation is not a DIY project and should be done by a licensed professional. Nonetheless, knowing the basics of the process will help you better understand and communicate with your contractor, ensuring a smooth and stress-free installation.
In this article, we will guide you through the essential steps of installing a residential septic tank, from planning and site preparation to inspection and testing. So, put on your hard hat and let’s get started!
Planning and Permits
Before you start digging, it’s important to make sure you have all the necessary permits and have properly planned for your residential septic tank installation.
Local permit requirements vary, but typically you’ll need to obtain a permit before installing a septic system on your property. It’s important to check with your local health department to determine what specific permit requirements you need to meet.
In addition to permit requirements, you’ll also need to comply with zoning regulations, which may dictate the size and location of your septic system.
Once you have obtained the necessary permits and have determined the placement of your septic system, it’s time to prepare the site.
This involves clearing the area of any trees, shrubs, or other vegetation that could interfere with the installation process. It’s also important to ensure that the soil is stable and able to support the weight of the septic tank and other components.
By properly planning and preparing your site, you’ll help ensure a smooth installation process and a functional septic system for years to come.
Site Preparation
To prepare the site for a septic system, it’s important to clear the area of any debris or vegetation and level the ground. Excavation depth and soil composition are also important considerations. The excavation should be deep enough to accommodate the tank, distribution box, and drain field. The depth will depend on the size of the tank and the soil composition. The soil should be permeable enough to allow for proper drainage, but not too permeable that it will allow wastewater to escape into the groundwater.
Here is a table to help you understand the different types of soil and their suitability for septic system installation:
| Soil Type | Description | Suitability for Septic System |
|---|---|---|
| Sand | Large particles with high permeability | Good |
| Loam | Mixture of sand, silt, and clay particles | Moderate |
| Clay | Small particles with low permeability | Poor |
Next, the tank installation process begins.
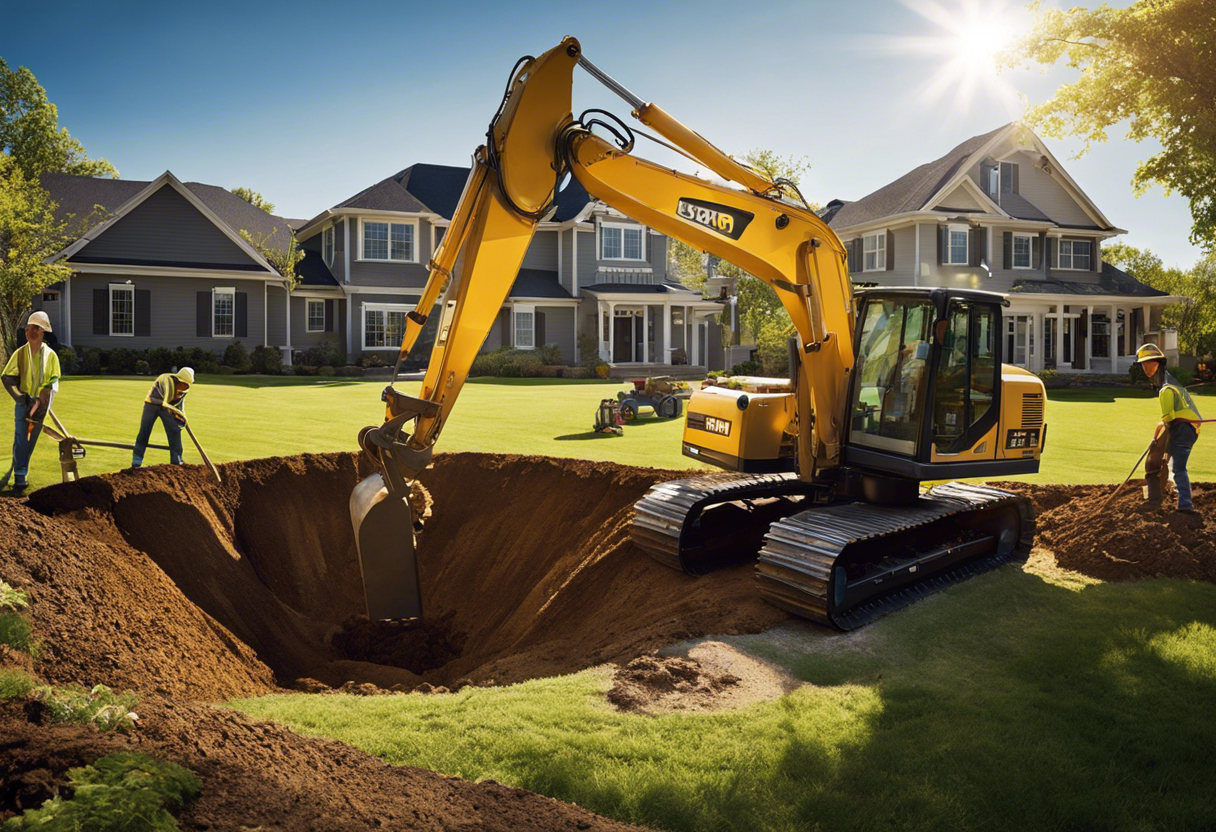
Tank Installation
Now that the site has been prepared and the soil suitability has been determined, it’s time to begin the process of installing the septic system’s essential component.
The first step is to excavate a hole in the ground that is deep enough to accommodate the tank. The excavation depth will depend on the size of the tank and the leaching field design.
The tank should be installed level and centered in the excavation, with enough clearance around it for access and maintenance. Once the tank is in place, the inlet and outlet pipes can be connected to the house plumbing and the distribution box or leaching field.
Before backfilling the excavation, it’s important to inspect the tank for any damage or defects, and to test the connections for leaks. The leaching field should also be inspected to ensure that it is installed at the proper grade and that the distribution pipes are evenly spaced and sloped.
Once the inspection and testing are complete, the excavation can be backfilled with clean soil, taking care to avoid any damage to the tank or pipes.
With the tank installation complete, the next step is to begin the final phase of the septic system installation: inspection and testing.
Inspection and Testing
After the tank has been installed, you’ll want to make sure it’s functioning properly by conducting a thorough inspection and testing for leaks. This process involves checking the tank and its components for any signs of damage or wear and tear, as well as ensuring that all connections are secure and functioning as they should.
You’ll also need to perform tests to check for leaks and ensure that the tank is properly sealed. To conduct leak detection tests, you’ll need to fill the tank with water and observe the levels over a period of time. If the water level drops, it may indicate a leak in the tank or in the connections. You can also use a dye test to identify any leaks.
Additionally, it’s important to establish a maintenance schedule for your septic system to ensure that it continues to function properly. This may include regular pumping, inspections, and repairs as needed.
Moving forward to the next section about common issues and troubleshooting, it’s important to note that even with proper inspection and maintenance, issues can still arise with your septic tank. It’s important to be aware of these common issues and how to troubleshoot them to avoid costly repairs or replacements.
Common Issues and Troubleshooting
When dealing with septic tanks, you may encounter common issues such as clogs and blockages that impede the proper flow of waste. Regular pumping of the tank is necessary to prevent such issues, as it removes solid waste and prevents the tank from becoming full. However, if the tank is beyond repair, replacing it may be the best option to ensure the longevity and efficiency of your septic system.
Adjusting the paragraph structure in this way helps to group complete sentences together, making the information easier to read and understand. Additionally, using contractions helps to make the writing more conversational and approachable.
Clogs and Blockages
One common issue homeowners face with septic tanks is clogs and blockages, which can lead to unpleasant odors and backups in the plumbing system. To prevent this problem, it’s important to be mindful of what goes down the drains. Avoid flushing non-biodegradable items such as wipes, diapers, and feminine hygiene products. Also, limit the use of harsh chemicals as they can kill the beneficial bacteria in the tank that break down waste. Instead, use septic-safe cleaning products and avoid pouring grease or oils down the drain.
Regular maintenance techniques such as pumping the tank every 3-5 years can also help prevent clogs and blockages. Pumping removes the solid waste that accumulates at the bottom of the tank and prevents it from clogging the pipes leading to the drain field. Neglecting to pump the tank can lead to backups and even system failure.
In the next section, we’ll discuss the importance of pumping the tank and what to expect during the process.
Pumping the Tank
To keep your septic system running smoothly, you’ll need to have it pumped every 3-5 years. Pumping maintenance is crucial to extend the lifespan of the tank and prevent any potential health hazards. Here are some things to keep in mind when it comes to pumping your septic tank:
-
Pumping the tank isn’t a DIY job. It requires specialized equipment and knowledge to safely remove the waste and dispose of it properly.
-
The frequency of pumping depends on the size of your tank and the number of occupants in your household. A larger tank and fewer occupants may mean less frequent pumping.
-
Neglecting to pump your tank can lead to clogs and blockages, which can cause backups in your home and damage to your septic system.
-
Pumping your tank is crucial not only for your system’s health but also for the environment. Proper disposal of the waste prevents contamination of groundwater and nearby bodies of water.
Regular pumping maintenance is just one way to keep your septic system in good condition. If your tank is beyond repair, it may be time to consider replacing the tank.
Replacing the tank requires careful planning and professional installation, but it can ultimately save you money and prevent further damage to your property.
Replacing the Tank
If you’re looking to upgrade your septic system, swapping out the old tank for a newer model can be a game-changer, giving your property a fresh start.
Replacing the septic tank is a critical component of septic tank maintenance, and it requires careful planning and execution.
One of the main reasons why homeowners opt for a new septic tank is the environmental impact. Old tanks can leak and contaminate the surrounding soil and water bodies, leading to serious pollution issues. Hence, replacing the tank can ensure that your property is not only hygienic but also environmentally responsible.
Before you replace the septic tank, you need to assess the soil conditions, tank size, and location. The new tank must be of the right size and installed in a suitable location to ensure optimal performance.
The installation process involves excavating the old tank, removing it, and placing the new tank in the correct position. The process may also require additional work, such as upgrading the drain field and connecting the tank to the plumbing system.
With proper planning and execution, replacing the septic tank can be an excellent investment that improves your property’s value and protects the environment.